Home
msts-trains StationTweaks
Camera AnglesA New Headout View
Equipment & Scenery
SP Alco S4 #1474New Rail 1
Real Falling Snow
City Track
Utility
Transparent Driver AidsKeyboard Template
Miscellaneous
Favorite ScreenshotsLinks

a new headout view
Many locomotives have what is called a "headout" view. When in the cab of a loco, press the up or down arrow keys to see if the view changes, giving you a view up or down the tracks from the right side of the engine. If it changes, your loco has a headout view. The camera position of this view can actually be anywhere you want, and you can modify it or even add a headout view to an engine which doesn't have one.
We'll make a minor modification to the .ENG file for the locomotive which will position the camera at the back left of most engines. The exact settings are calculated for an SD40 or F40 loco, as if we are standing on the rear deck looking over the railing. We'll also make a couple of modifications to the camcfg.dat file to give us much better screenshots from our headout view. You did want to take a screenshot, didn't you?
As always, be sure to make a backup copy of the original .ENG file and camcfg.dat file before you start.
Find the engine you want to modify. It will be in your Train Simulator\TRAINS\TRAINSET\[engine] folder. Look for the .ENG file and open it in a unicode compatible text editor. If the engine already has a headout description, you will see a field that looks something like this. The actual values may be slightly different:
HeadOut ( -1.76 3.4 -4.7 )
If the engine does not have a headout description, we will add one by doing the following: copy the headout line below and paste it into the .ENG file right after the cab view callout line. The cab view callout will look similar to this CabView line:
CabView ( F40-Gr-F-C80.cvf )
HeadOut ( -2.0 3.0 -8.1 )
If the engine already has a headout description, change its values to
( -2.0 3.0 -8.1 ). Now resave the .ENG file.
Again, the values supplied for our new headout place the camera at the left rear of the loco. They are calculated for an SD40 or F40, but should work fairly well for most locos. If need be, you can tweak the values to position yourself differently. Here is a breakdown of the values and what they mean, as I understand them:
-2.0 = 2.0 meters to the left of track center (for right, drop the minus)
3.0 = 3.0 meters above rail head
-8.1 = 8.1 meters back from the design origin point of the loco.
Now let's modify the camcfg.dat file for a closer view. Look for the camcfg.dat file in the Train Simulator\GLOBAL folder and open it in your unicode compatible text editor. Find the HeadOut Cam section and make the following change to the FOV and RotationLimit fields:
camera ( CamTypeHeadout
CamType ( CamTypeHeadout CamControlRotate )
CameraOffset ( 1.046 2.14 4.506 )
Direction ( 0 0 0 )
RotationLimit ( 90 180 0 )
Fov ( 30 )
ZClip ( 0.5 )
WagonNum ( 0 )
Description (Headout_Cam)
)
The field of view (FOV) has been changed to 30 to give a closer, zoomed view. Something close to this value seems to give the best screenshots. 54 gives a natural distance view. Values higher than 54, like 80, 90, or 100 give more of a wide angle view, good for long distance viewing. The RotationLimit has been expanded to accomodate the changed FOV value.
To test, start the sim, select your modified loco, and check the result. You can use the left and right arrow keys or the mouse (hold right button down) to scan from forward to rearward view. This view makes for some great screenshots. There is no other way to get as close to the loco except by using the CTRL-SHIFT-9 keys, and that in itself is difficult to get positioned properly.

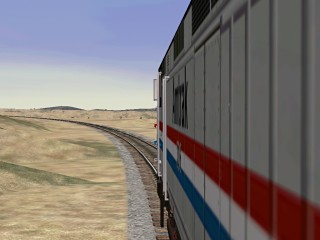
New HeadOut View (looking forward)

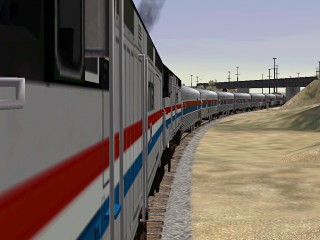
New HeadOut View (looking backward)
